
Describe Your Brief
Main purpose
The primary purpose of the “Describe your Brief” page is to provide the high-level description of the tactic, hopefully so the approver of the tactic can quickly assess the scope of the marketing campaign.
The other functional purpose of the page is to capture the required Salesforce fields, so the campaign will be created in Salesforce and align successfully in your Marketing Automation System and Salesforce. This is done through the formation of the Reference Code, denoted by the #, on the right hand side of the page. This code uses information from the picklist field to generate a unique code that will be used in the Demand.Center and Salesforce Hierarchy.
Summary of fields
The fields in red are mandatory fields and must be completed before progressing on to the next stage of the brief creation process. The campaign will be created in Salesforce and will align successfully in both Salesforce and your Marketing Automation System. You will be unable to save your brief if these fields are not completed.
Some fields are always shown with the same picklist options. Some fields, however, are only shown dependent on the choices you’ve made (mostly due to campaign type). Equally the picklist options for some fields will only show depending on other fields.
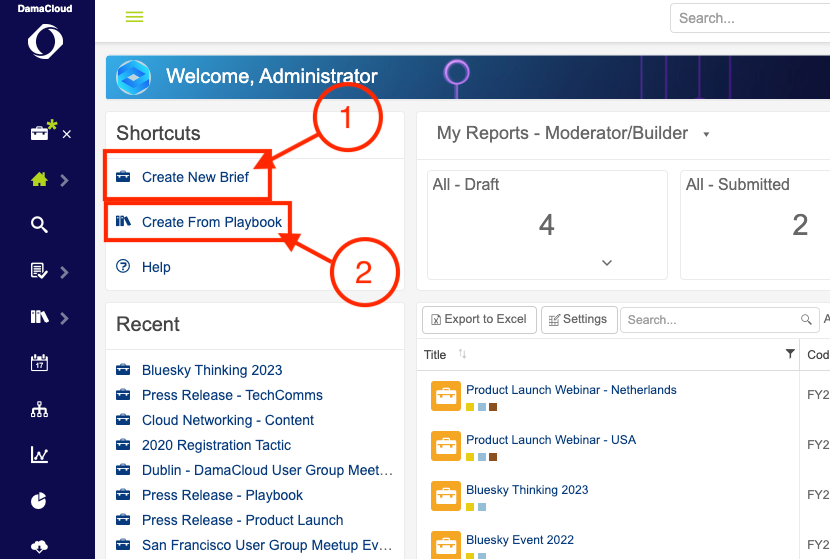
You can create your brief in two different ways. On the hompage there are two options you can choose:
- Create Brief From Playbook
- Create New Brief
Fields
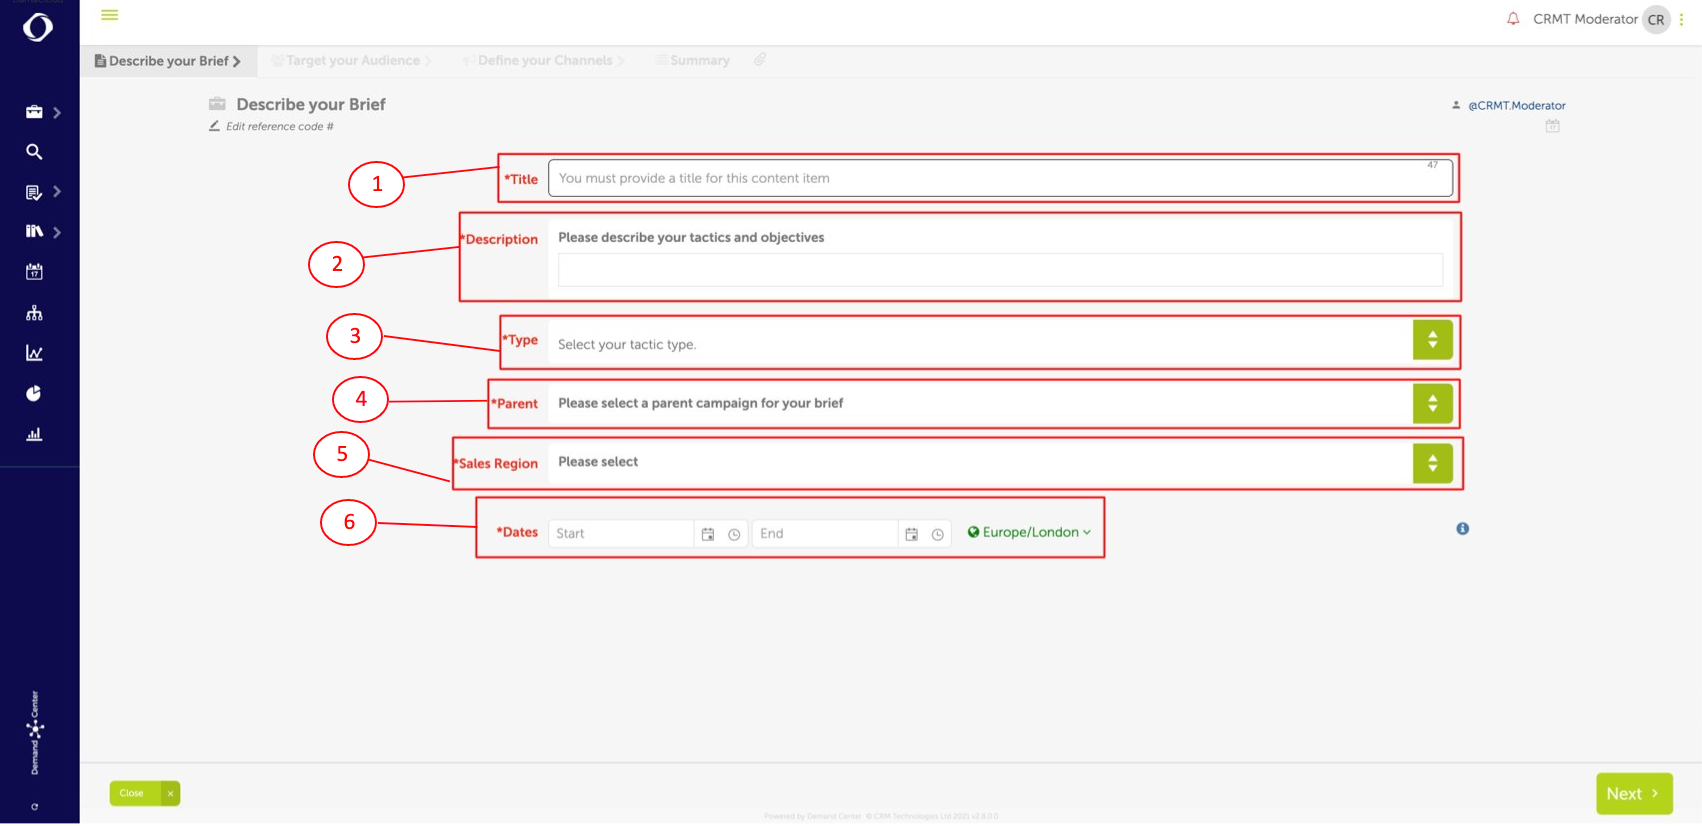
The information that is captured on this page will be the core components of the brief. Most of these fields will become the parameters for the campaign in Salesforce or its equivalent in other CRM systems. They will also drive the naming conventions for the campaign codes and will become part of the asset titles. (Hierarchy)
- Title - This field allows you to provide the title for your tactic. The field is a simple text field and by default it is configured to allow a maximum of 47 characters in length (including spaces). By default, this will become part of the "Campaign Code" and should make it easy to identify the tactic in other systems.
- Description - This is also a simple text field, it is not used in the tactic code. It is a long text field. If you need more space, then use the resize icon in the corner of the text box to increase the visible length of the field. By default, this field is not part of the naming convention, but it can be mapped to the description field on the Salesforce Campaign or its equivalent in other CRM Systems.
- Type – The type field is the "Offer" for the campaign. Examples would be: "Webinar", "Newsletter" or "Event". By default, what is mapped to the Campaign Type field in Salesforce, or its equivalent in other CRM systems, and the picklist should align with these fields in both your CRM System and your Marketing Automation System. By default, it also feeds into the naming convention.
- Parent – This component has a selection mechanism. Within the system it is referred to as the Parent Picker. The Parent Picker allows you to select where in the campaign and program hierarchy the tactic should reside. It feeds into the naming convention and it should integrate with Salesforce or other CRM systems. When a combination has been chosen that does not yet exist the Parent Picker will create this for you. When you send the tactic to your CRM system through the integration the relevant parts of the hierarchy will also be created.
- Sales Region - If your GEO is not global in your account settings then this field will appear - you must pick which regions of your GEO you'd like to market to. You can choose 'All of (your chosen GEO)" for a tactic if you like
- Date - The dates of the tactic are a mandatory field. To choose a start and end date of your campaign, you can either type the date in the format (DD/MM/YYYY) and the time in the format (HH:MM AM/PM). The easier method is to click on the calendar icon, and use the arrows to move the month, then click on the day you are looking for. Do this for the end date too. Similarly, to set the time click on the clock icon, and specify the time to the nearest 30 minutes. It is also possible to choose the time zone for the brief. To do this, click on the world icon with the specified time zone, a drop-down box will allow you to select the time zone and the city. By default this field is mapped to the start and end date of your Salesforce campaign (or its equivalent in another CRM system) however this is not required. This field is not part of the naming convention.
After completing all fields with the required information, you should be able to continue with targeting your audience by clicking on "Next". More info for "Targeting your Audience" can be found here.