Marketo Upload Control
Overview
The Upload Control is a data validation and data import tool that is part of the Demand.Center solution. It enables users to perform data uploads into a Marketing Automation System through a user-friendly interface. As Marketo does not use picklists as such, it can be hard to maintain consistency in your Marketing Automation System. The Upload Control makes sure this is covered at the point of entry into the system.
To do this Upload Control forces users to conform to pre-defined picklists and required fields. This ensures the quality of the data and compliance with data policies.
Also, by enabling users to do their own data uploads, the need for others within the organization to handle Personal Identifiable data is reduced.
The tool is built to only hold the data for validation and uploading purposes. Once the process is complete, the data will be wiped from the system after it has timed out.
Functionality
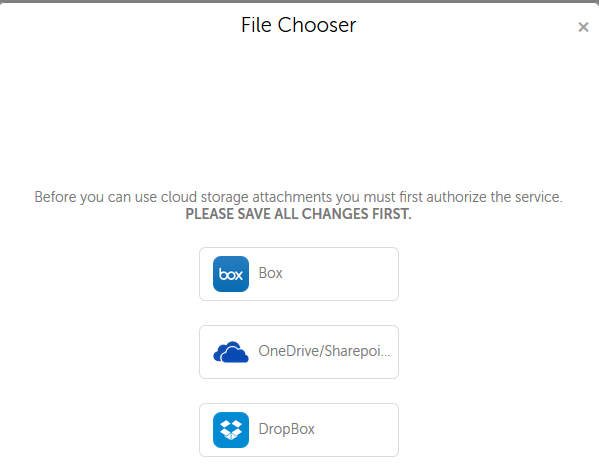
A user can select a comma-separated value (.csv) or excel (.xls, .xlsx) file from the following cloud services:
- Dropbox
- Box
- OneDrive/SharePoint
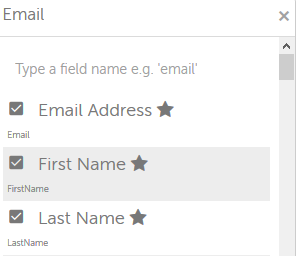
Upon selecting a file to upload, the user is able to map the columns in the file to the Marketing Automation System fields or specifically marked required fields (Starred) to determine what the record is.
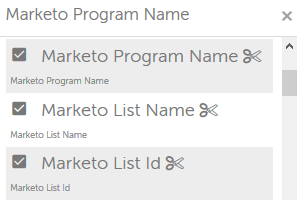
Optionally, a user can decide to split and upload a single file to multiple lists. This can be done by mapping the split marked fields (Scissors). These require either a Program Name column and List Name column to be mapped or the List Id column to be mapped. If the List Id Column is mapped, then uploading to the defined list for the record will take priority over creating a new list under the specified program name and list name.


Once the file columns have been mapped, Data Uploader will validate the file to ensure that the values match the correct field type. If the contact field depends on a picklist, the value will be matched against the picklist values setup within Data Uploader. During validation, if the user has opted to split the file, then Data Uploader will also validate that the List or Program exists in Marketo.
If any value is incorrect during validation, that contact cannot be uploaded. To allow the user to correct any issues found, Data Uploader will provide an error file. The user may continue to upload the valid contacts if they wish before looking at the invalid records.
After validation, if doing a ‘non-split’ upload, the user can also select the option to add the contacts being uploaded to an existing static list.
During upload, any existing contacts will be updated based on the field update rules setup in Marketo.
Instructions
- Start the Upload Control from the user drop-down menu (if user permissions allow). If a user with only Data Uploader permissions logs in, they will be taken straight to the Uploader.

2. Select which folder you wish to use or create a new folder if required. Folders are intended to be used at a high level, e.g. by user. Creating a folder for every upload is not recommended.
3. Within the chosen folder it is possible to view the previously uploaded files, or to continue an incomplete process.

4. Clicking a file name will show the status of a previous import.
5. Clicking the arrow-in-a-box icon will download or open the actual file, depending on the file type, location and permissions.
6. To add a new file that you wish to upload to Marketo, click the ‘Explore’ button in the bottom right corner to open the file chooser.

7. Choose the service you wish to connect to, such as OneDrive or SharePoint and then log in. It is possible to log in to multiple services, if required.
8. Use the browser to locate your file and then select it.
9. The file will appear in your Demand.Center folder.

10. The file will need to be mapped and validated before importing to your Marketing Automation System - click on the file name to continue the process.
11. The column names from the uploaded file are listed on the left and the field names in your Marketing Automation System are listed on the right.
12. Demand.Center will attempt to map the field names automatically. To change the mapping, click on the row you wish to change and locate the correct field within the pop-up list.

13. To un-map the field, remove the tick from the appropriate box in the pop-up list, or click the "X" in the first column to remove the line altogether.
14. You must select a field which will be used as the key (identity) field during the import process. This is the field which will determine whether a record is new and should be imported, or whether it exists and should be updated. The available fields (if displayed) are Id and Email Address - other fields could be used depending on your marketo configuration. It is important to select the radio button against the correct key field before validating.

15. It is important that date fields are formatted in an unambiguous way for your Marketing Automation System, which follows W3C format (ISO 8601). The best practice is to always include the timezone offset and to use complete date plus hours and minutes in the form:
YYYY-MM-DDThh:mmTZD
where TZD is “+hh:mm” or “-hh:mm”
Example: 2017-05-27T15:41:32-05:00
16. If the file requires splitting, make sure that at least List Id or Program Name and List Name have been mapped to the split fields marked by the ‘Scissors’ icons.
17. Once all the fields have been mapped, click the Validate button, or save for later.
18. After the validation process has completed, the tool will report a summary of valid and invalid records. You can use the links provided to download files of the valid and/or invalid records. The invalid file will contain an additional column to indicate what failed validation for each record.
19. If the file is not being split, a section under the progress bar will appear to allow you to enter the URL of the program or list in Marketo that you wish to assign the imported people to (if required). You can also enter the name of a program and click the search icon to have Demand.Center find the available list options for you.
If you do not wish to assign the imported people to a specific list, remove the tick from the ‘Use Program Or List Id/URL’ checkbox before continuing with the import. Note that this checkbox is ticked by default.
If the file is being split and uploaded to multiple lists, this section will not appear as the information is already contained within the file.

20. If you are happy with the results and wish to proceed, click ‘Import’ to import. Following the import, Demand.Center will display a notification screen with a summary of the number of records imported, along with a count of any warnings or fails.

